Plumbers Spring TX install and repair the pipes that deliver water, gas, and waste to and from homes and businesses. They also work on sinks, bathtubs, toilets, and other fixtures.
If you’re thinking about becoming a plumber, this is an in-demand career that offers stability and a good salary. But it’s not for everyone.
The job duties of a plumber involve installing, repairing and maintaining plumbing systems. These systems deliver water, waste and other materials throughout residential, commercial and industrial environments. Plumbers are skilled individuals who have a thorough understanding of hydraulic systems and can work with a wide variety of materials and piping. They often perform complex tasks such as identifying and diagnosing plumbing problems, connecting pipes to fixtures and appliances, and inspecting systems for compliance with building regulations.
Plumbers are also responsible for the installation and repair of gas lines and may work with other types of energy systems that intersect with plumbing, such as heating and cooling systems. They also provide customer service, interacting with clients to understand their needs and answer questions. Some plumbers are on-call for emergency situations, which can require them to work evenings and weekends.
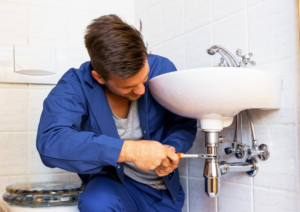
A plumber’s work environment depends on the type of plumbing system he or she maintains. For example, a plumber who works on residential plumbing systems will typically install and repair items like bathtubs, toilets, showers, sinks and faucets. These plumbers will likely maintain and repair domestic water heaters, garbage disposals and dishwashers. Additionally, these plumbers may be responsible for repairing and replacing parts of larger water, waste and venting systems found in multiple rooms or buildings.
Larger commercial and industrial plumbing systems present a different work environment. These systems are generally larger in scale, and plumbers will often collaborate with other professionals to ensure that all plumbing components are properly installed and connected. Plumbers who work on these types of larger systems may be responsible for repairing and maintaining sewage systems, fire sprinkler systems, HVAC systems and other more complex equipment.
Plumbers also must be knowledgeable about local and state regulations regarding the installation of plumbing systems, and they should be able to interpret blueprints and building plans. Additionally, they may be responsible for obtaining the necessary inspections and permits for plumbing projects. Other responsibilities include cleaning and disinfecting tools, ensuring that all work is performed to industry standards, keeping detailed records of labor and material costs, and reporting to supervisors or project managers on the status of plumbing projects.
Education Requirements
There are a variety of education requirements to become a plumber. Typically, a high school diploma is required, but some people choose to pursue a degree in vocational training or plumbing. This is often available at local community colleges and trade schools. These programs can provide the knowledge and skills needed for a career in plumbing, including topics like plumbing codes, safety regulations, blueprint reading, and various plumbing techniques. Some people also choose to complete an apprenticeship program. These can last up to five years and combine on-the-job training with classroom instruction. Apprentices will usually earn a wage during this time as well. Many of these programs are offered through local plumbing companies, unions, and vocational schools.
Whether or not a person decides to pursue a degree or an apprenticeship, they must pass a certification exam in order to get licensed as a plumber. This exam will test their knowledge of plumbing codes, safety procedures, and general trade practices. It is important for potential plumbers to take the time to thoroughly prepare for this exam, which can be done by enrolling in exam preparation courses or by studying plumbing textbooks and guides.
Because plumbers work directly with customers, it is also important for them to have excellent customer service skills. This includes being polite, professional, and responsive to client concerns and questions. They must also be able to explain complex plumbing issues and solutions in a way that is easy for the average person to understand.
In addition to having a good education and training, plumbers must also be comfortable working with their hands and using tools. They must have strong critical thinking skills in order to troubleshoot problems and come up with solutions quickly. They must also be able to read blueprints and understand technical diagrams. Plumbers must also have the ability to work both independently and as part of a team.
New York City has its own unique educational requirements for becoming a plumber, and it is recommended that aspiring plumbers contact the Department of Buildings in their city to determine what those requirements are. However, the state of New York requires that aspiring plumbers meet a minimum number of training and education hours before sitting for the licensing exam. This is a good idea as it will ensure that future plumbers have the necessary skills and knowledge to be successful in the profession.
Training Requirements
Besides education, most states require plumbers to obtain years of hands-on experience working as an apprentice or journeyman under a licensed master plumber. This training typically includes work experience in all aspects of plumbing including installing new systems, repairing existing ones, and inspecting, maintaining, and replacing them. This work experience is necessary for certification, and most apprenticeship programs take four to five years to complete. You can also pursue a formal plumbing program at a vocational school or community college to learn the skills and knowledge you need for this career.
Plumbers need to stay up-to-date with the latest techniques, equipment and tools. This means that they must regularly attend continuing education courses to learn about new technologies and plumbing codes and regulations. These courses are often offered by the plumbing industry or are available through online resources. Some plumbers also become instructors or tutors to help others in the trade.
Some plumbers choose to get a bachelor’s degree in a relevant subject, such as civil engineering, construction management, or a related field. This can open up new career opportunities for them, including becoming a project manager or supervisor.
A bachelor’s degree also opens up the option of pursuing a master’s degree in a field like engineering, which can lead to a more lucrative career. These degrees can also provide a path to getting a license to become a professional engineer.
Some states have specific requirements to become a licensed plumber, such as passing an exam and meeting the minimum number of years on-the-job training as an apprentice or journeyman. You can find out about these requirements by checking with your state’s licensing department. In New York, for example, you must have completed a four-year apprenticeship program and have 8,000 hours of work experience as a journey plumber to qualify to take the examination.
In addition to these qualifications, you must pass a background check and drug test to work as a plumber. Moreover, you must have a valid driver’s license to operate company vehicles and travel between jobs. Plumbers must also be able to perform the physical tasks of their job, which can involve lifting heavy objects and climbing ladders.
Work Environment
Plumbers often work on construction sites, collaborating with other tradespeople to install plumbing systems in new buildings. They also may work with architects and designers to develop plumbing plans for a building project. Some plumbers specialize in commercial or residential plumbing, while others work with industrial clients to provide specialized services like water supply systems and waste management systems.
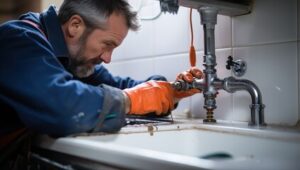
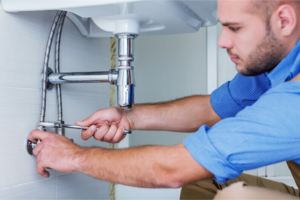
Plumbers also work in home and business offices, fixing a range of problems that occur in these settings. They may repair toilets, sinks, faucets, tubs, showers, water heaters and other appliances. Because these issues can arise at any time, plumbers often must be available on call to perform emergency repairs. They typically work on-call shifts and are required to respond quickly to calls for help.
Some plumbers have their own businesses, allowing them to control their work schedules and choose the projects on which they wish to take part. This type of job independence can be appealing to some people who want to pursue a career in the field.
Other plumbers work for government agencies or municipalities, focusing on public infrastructure projects. This type of work requires a strong background in engineering and knowledge of local building codes.
In some cases, plumbers are employed by private businesses to manage their own plumbing departments and oversee a team of employees. These employers may offer different benefits, including health insurance and a retirement plan.
Many plumbers have the option to become independent contractors, offering their services to a wide range of customers and companies. This allows them to control their own work schedules and have a more flexible lifestyle. It also gives them the opportunity to increase their earning potential by partnering with other professionals in the industry.
Choosing a career as a plumber requires careful consideration of one’s personal and professional goals. This profession involves significant physical labor and is not suited to people who do not enjoy working with their hands or are not comfortable performing strenuous physical activities. It is important for prospective plumbers to research the different work environments and training options available before making a decision. Platforms like Dreambound can help individuals find vocational training programs that align with their career goals and desired work environment.